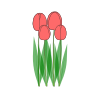
Tulips are vibrant, cup-shaped flowers that are widely celebrated for their elegant simplicity and diverse range of colours. Native to Central Asia but famously associated with the Netherlands, tulips have become a symbol of spring, renewal, and beauty. These perennial plants belong to the genus Tulipa and are part of the lily family (Liliaceae).
Tulip flowers grow on upright stems, typically ranging from 10 to 24 inches tall, and feature a single bloom with six petal-like tepals. They come in a stunning variety of colours, including red, pink, yellow, white, purple, orange, and even bi-coloured or striped patterns. Their petals can be smooth, fringed, or ruffled, depending on the variety.
Tulips thrive in well-drained soil and temperate climates, making them a popular choice for gardens, landscapes, and floral arrangements. They are often planted as bulbs in the fall to bloom in early to mid-spring. Known for their historical significance during the "Tulip Mania" of the 17th century, they continue to captivate gardeners and flower enthusiasts around the world with their timeless charm and versatility.
How To Grow
Growing tulips is relatively simple and rewarding, as they add vibrant beauty to gardens and landscapes. Here’s a step-by-step guide to growing tulips:
-
Choose the Right Location
Sunlight: Tulips thrive in full sunlight, though they can tolerate partial shade.
Soil: Ensure the soil is well-drained to prevent bulbs from rotting. Sandy or loamy soil is ideal. Avoid overly wet or clay-heavy soils.
-
Pick the Right Time to Plant
Best Season: Plant tulip bulbs in the fall, 6–8 weeks before the first hard frost. This gives the bulbs enough time to establish roots before winter.
Soil Temperature: Plant when the soil temperature is below 60°F (15°C), typically in late September to early November, depending on your region.
-
Prepare the Soil
Loosen the Soil: Dig and loosen the soil to a depth of 8–12 inches.
Amendments: Mix in compost or well-rotted manure to enrich the soil. You can also add bone meal or bulb fertilizer to encourage root growth.
-
Plant the Bulbs
Depth: Dig a hole 6–8 inches deep. Plant bulbs deeper in sandy soils (up to 10 inches).
Spacing: Space tulip bulbs 4–6 inches apart.
Position: Place the bulb with the pointed end facing up. The flat end (where roots will grow) should face downward.
Cover: Gently cover the bulbs with soil and pat lightly.
-
Watering
Water the bulbs thoroughly after planting to help settle the soil and initiate root growth.
Avoid overwatering, as tulip bulbs dislike soggy soil.
-
Winter Care
Tulips are hardy and can tolerate cold winters. In colder climates, you can add a light layer of mulch (straw or bark) after the first frost for extra protection.
-
Spring Care
As the tulips emerge, remove any mulch to allow sunlight and air to reach the plants.
Water occasionally if spring rainfall is minimal.
-
After Blooming
Once tulips bloom, enjoy their beauty! After the flowers fade:
Deadheading: Remove spent flowers to prevent the plant from using energy on seed production.
Leave the Leaves: Allow the green foliage to remain until it turns yellow and dies back naturally. This helps the bulb store energy for the next year.
-
Digging and Storing (Optional)
In warmer climates where tulips don’t perennialize well, dig up the bulbs after the foliage has died back.
Clean and store them in a cool, dry place until it’s time to plant again in the fall.
Tips for Success
Choose high-quality, disease-free bulbs from a reliable source.
For a longer bloom season, plant a mix of early, mid, and late-blooming tulip varieties.
Protect bulbs from pests like squirrels and rodents by covering them with chicken wire or using repellents.
How/When To Harvesting
Harvesting tulips requires care to ensure the flowers stay fresh and the bulbs remain healthy for future growth. Here's a step-by-step guide on how to harvest tulips, whether for floral arrangements or to manage your garden:
-
Determine the Right Time to Harvest
For Fresh Flowers:
Harvest tulips when the flower buds are fully formed but still closed. They should show some colour, ensuring they will open after being cut.
Early morning is the best time to harvest, as the plants are fully hydrated and less stressed.
For Bulbs (if lifting them):
Harvest the bulbs after the flowers have faded and the foliage has turned yellow or brown. This allows the bulb to store nutrients for the next growing season.
-
Harvesting Tulips for Cut Flowers
Tools Needed: Use clean, sharp garden shears or scissors to minimize damage.
Method:
Identify the tulips with buds that are just beginning to show colour.
Hold the stem gently to avoid crushing or bending it.
Cut the stem at the base, as close to the soil line as possible.
Immediately place the harvested tulips in a bucket of cool, clean water to maintain freshness.
Note: If you want the bulbs to regrow next season, leave some foliage behind when cutting stems, as this helps the bulb store energy.
-
Harvesting Tulips with Bulbs (Optional for Long Vase Life)
If you’re harvesting tulips for floral arrangements and don’t need to keep the bulbs in the ground:
Gently loosen the soil around the tulip plant with a trowel or garden fork.
Carefully lift the entire plant, bulb included.
Rinse the bulb and roots to remove excess dirt.
Keep the bulb intact for an extended vase life, as it continues to provide nutrients to the flower.
-
Post-Harvest Care for Cut Tulips
Trim the Stems: Recut the stems at a 45-degree angle underwater to maximize water absorption.
Conditioning: Place the tulips in cool water and store them in a cool, dark place for a few hours before arranging.
Vase Maintenance:
Use clean water and change it every 1–2 days to keep tulips fresh.
Add floral preservative or a small amount of sugar and lemon juice to the water to prolong their life.
Support Growth: Tulips continue to grow slightly in the vase, so leave extra space in arrangements for their upward movement.
-
Harvesting Bulbs for Replanting
Digging Up Bulbs:
Wait until the foliage has completely died back (6–8 weeks after blooming).
Loosen the soil with a trowel or fork and carefully lift the bulbs.
Cleaning and Storing:
Brush off excess dirt and allow the bulbs to dry in a cool, well-ventilated space for a few days.
Discard damaged or diseased bulbs.
Store healthy bulbs in a mesh bag in a cool, dry location until fall planting.