Spring cabbage is the "early bird" of the brassica family, arriving as a much-needed splash of vibrant green when most other garden vegetables are still dormant. Unlike the dense, heavy cannonballs of winter cabbage, spring varieties are prized for their tender texture and pointed, conical shape.
Here is everything you need to know about this seasonal delicacy:
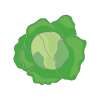
Appearance and Texture
Shape: Often referred to as "pointed" or "heart" cabbage because of its distinctive tapered head.
Leaves: The leaves are looser and more open than summer or winter varieties. They have a bright, emerald-green color and a delicate, almost buttery crunch.
Size: Generally smaller and lighter, making them perfect for single-meal use without taking up half your fridge.
Flavour Profile
Spring cabbage is notably sweeter and milder than its robust cousins. It lacks the harsh, sulfurous punch often associated with overcooked winter cabbage. Because it is harvested while the leaves are still young, it has a fresh, "grassy" sweetness that pairs beautifully with simple seasonings.
Best Ways to Enjoy It
Because the leaves are so tender, spring cabbage requires very little cooking time. Overdoing it is the only way to ruin it
How To Grow
Growing spring cabbage requires a bit of "backward" thinking—unlike most vegetables, you sow it in late summer so it can survive the winter and hit the ground running as soon as the weather warms up.
Here is the step-by-step guide to growing a successful crop.
- Timing: The "Overwintering" Schedule
Spring cabbage is actually a slow-maturing crop. To get that early spring harvest, you must follow this timeline:
Sow: Late July to August.
Plant Out: September to October (once seedlings have 4–6 true leaves).
Harvest: March to May the following year.
- Sowing and Soil Prep
Method: It is best to sow in modular trays (seed trays with individual cells). This minimizes root disturbance when you move them later.
Soil Type: They love firm, fertile soil with a neutral to slightly alkaline pH (6.5–7.5). If your soil is acidic, adding a bit of garden lime a few weeks before planting helps prevent "Club Root" disease.
+1
Preparation: Dig in well-rotted compost or manure a few months before planting. Just before you transplant, tread the soil down with your heels—cabbages like a very firm footing to help them resist winter winds.
- Planting and Spacing
The Depth: Plant your seedlings deep, so the lowest leaves are just above the soil line.
Spacing:
For "Spring Greens": Space them 10–15cm apart. You’ll harvest the leaves young before they form a heart.
For "Hearted" Cabbage: Space them 30–45cm apart to give the heads room to swell.
The "Half-and-Half" Trick: Many gardeners plant them 15cm apart, then harvest every other plant as "greens" in March, leaving the remaining ones to grow into full heads for April/May.
- Winter Care
Earthing Up: In late autumn, draw the soil up around the base of the stems (making a small mound). This prevents the plants from rocking and loosening in the wind.
Feeding: They don't need much food in the winter, but a high-nitrogen liquid feed or a sprinkle of chicken manure pellets in late February will give them the "fuel" they need for their spring growth spurt.
- Pest Protection (Crucial!)
Cabbages are the "chocolate" of the garden—everyone wants a bite.
Pigeons: They will shred cabbage leaves in winter when other food is scarce. Use netting or a fruit cage to keep them off.
Cabbage White Butterfly: Use a fine mesh (like Enviromesh) to prevent them from laying eggs. Even in late summer, caterpillars can be a problem.
Cabbage Root Fly: Use "cabbage collars" (small cardboard discs) around the base of the stem to stop flies from laying eggs in the soil
How/When To Harvesting
Harvesting spring cabbage is a two-stage process. Depending on how much patience you have, you can treat them as "spring greens" (loose leaves) or wait for them to form "hearts" (pointed heads).
Here is the best way to approach your harvest:
- When to Harvest
For Spring Greens (March/April): You can start harvesting as soon as the plants are large enough to provide a decent handful of leaves. They won't have a solid center yet. This is often done by "thinning"—harvesting every other plant in the row to give the remaining ones space to grow.
For Hearted Cabbage (April/May): Wait until the center of the cabbage feels firm and solid when you give it a gentle squeeze. If it feels soft or "hollow," let it grow for another week or two.
- The Technique
The Cut: Use a sharp garden knife to cut through the main stem about 5cm (2 inches) above the soil level.
The Angle: Try to make a clean, horizontal cut.
Time of Day: Harvest in the early morning if possible. This is when the leaves are at their most hydrated and crisp. If you harvest in the heat of the day, they may wilt quickly.
- The "Second Harvest" Trick
One of the best things about spring cabbage is that the plant often wants to keep giving. Don't pull the stump out of the ground!
The Cross Cut: After you’ve removed the main head, use your knife to cut a deep "X" (about 1cm deep) into the top of the remaining stump.
The Result: This encourages the stump to sprout several smaller, "mini" cabbages (sprouts) from the sides. These will be ready to pick in a few weeks and are incredibly tender.
- Storage
Spring cabbage is much more delicate than winter cabbage and does not store for months.
Fridge: Keep it in the crisper drawer; it will stay fresh for about 1–2 weeks.
Prep: Only wash it right before you are ready to use it, as excess moisture in storage can lead to rot.