Think of the shallot as the sophisticated, slightly more well-travelled cousin of the common onion. While they belong to the same family (Allium cepa), shallots offer a complexity that can turn a basic dish into something you’d pay $30 for at a bistro.
What Makes Them Different?
If an onion is a blunt instrument, a shallot is a scalpel. Here is the breakdown of what sets them apart:
The Flavour Profile: Shallots are much milder and sweeter than white or red onions. They lack that aggressive "bite" and sulfuric aftertaste, offering instead a delicate balance of sweet onion and mellow garlic.
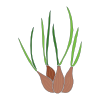
The Physical Structure: Underneath that papery, copper-coloured skin, you’ll usually find two or three individual cloves clustered together, similar to a head of garlic.
The Texture: When cooked, they break down into a buttery, jam-like consistency much faster than standard onions, making them ideal for silky sauces.
Quick Pro-Tip
If a recipe calls for shallots and you’re fresh out, you can substitute the white part of a green onion (scallion) or a small amount of red onion—just maybe soak the red onion in cold water for 10 minutes first to take the "punch" out of it.
Fun Fact: Because they grow in clusters rather than single bulbs, shallots were once thought to be a different species entirely
How To Grow
If you can grow an onion, you can grow a shallot—but the process is arguably more satisfying because of the "multiplication" factor. One small bulb (a set) usually yields a cluster of 6 to 12 new shallots.
Here is how to grow them like a pro.
- Timing: The "Shortest Day" Rule
Traditional gardening wisdom says to plant on the shortest day (Winter Solstice) and harvest on the longest day (Summer Solstice). While you don't have to be that precise, it highlights that shallots love a long growing season.
Autumn Planting (Oct–Nov): Best for an early summer harvest. Use specific "overwintering" varieties like Jermor.
Spring Planting (Feb–April): The most common window. As soon as the soil is workable and not frozen, they can go in.
- Preparation: Soil & Location
Shallots are light-eaters but hate "wet feet."
Sun: They need a full-sun spot to develop those sugars.
Soil: Well-drained is non-negotiable. If you have heavy clay, grow them in raised beds or containers to prevent rot.
Feed: Mix in some well-rotted compost or a general-purpose fertilizer a few weeks before planting.
- Planting: The "Bird-Proof" Method
Most people grow from sets (immature bulbs) because they are faster and more reliable than seeds.
Spacing: Space sets about 15–20cm apart, with 30cm between rows. They need room to "clump" outward.
Depth: Push the bulb into the soil so only the very tip is poking out.
The Bird Problem: Birds love to pull up newly planted sets (they think they’re worms). Gently firm the soil around them, or cover the row with netting or horticultural fleece until they have rooted firmly.
- Care and Maintenance
Watering: Water during dry spells in spring and early summer. Stop watering entirely once the bulbs have swelled and the leaves start to turn yellow (usually July); moisture at this stage causes rot.
Weeding: Shallots have shallow roots and hate competition. Hand-weed rather than using a hoe to avoid nicking the growing bulbs.
Scapes: If a flower stalk (scape) appears, snap it off immediately so the plant puts its energy into the bulb, not seeds.
- Harvesting & Curing
When the green tops fall over and turn brown, your shallots are ready.
The Lift: Use a garden fork to gently prize the whole cluster out of the ground.
The Sun Tan: Leave them on the soil surface (if it’s dry) for a day or two, then move them to a dry, airy spot (like a shed or greenhouse) for 2 weeks.
Storage: Once the skins are papery and the roots are brittle, pull the clusters apart and store them in mesh bags. They can last up to 12 months
How/When To Harvesting
Harvesting shallots is all about patience and watching for the "flop." Since they are a "clump" crop, you aren't just pulling one bulb, but a small family of them.
Here is the step-by-step guide to a successful harvest:
- Recognize the Signs
Shallots will tell you exactly when they are done. Don't rush them; if you pull them too early, they won't store well.
The Yellowing: The vibrant green tops will start to turn yellow and then brown at the tips.
The Collapse: The most obvious sign is when the necks soften and the foliage flops over onto the ground.
The Split: You will see the soil cracking around the base as the single bulb you planted has now pushed upward and split into a cluster of 6–12 distinct bulbs.
- The "Lift" (Not a Pull)
Never pull shallots by their leaves, as this can tear the neck and invite rot.
Wait for a Dry Day: Moisture is the enemy of a long-lasting harvest. Aim for a window of 2–3 dry days.
Use a Fork: Gently slide a garden fork or hand trowel under the entire cluster. Pry upward to loosen the roots and "hoik" the whole family out of the soil.
Shake, Don't Scrub: Gently shake off the loose dirt. Do not wash them with water; they need to stay dry to cure.
- Curing (The Secret to Longevity)
Curing is the process of drying the outer skins so they become a protective, papery shell.
Sun Drying: If the weather is dry and sunny, leave them on the soil surface for 24–48 hours to "suntan."
Airflow is Key: Move them to a shaded, well-ventilated spot (like a porch, shed, or garage). Lay them out in a single layer on a wire rack or mesh tray so air can circulate underneath them.
Duration: Let them sit for 2 to 3 weeks. You’ll know they are done when the outer skins are crinkly and the roots feel brittle like straw.
- Sorting and Storage
Once cured, you can prep them for the pantry.
Clean Up: Rub off the remaining dried roots and any loose, dirty outer skins with your hands.
The Trim: You can trim the dried tops down to about 1 inch, or leave them long if you want to braid them like garlic.
The Bag: Store them in mesh or net bags (old onion bags or even clean pantyhose work great).
Environment: Keep them in a cool, dark, and dry place. Unlike onions, shallots are incredibly hardy and can last 6 to 12 months if stored properly.
Pro-Tip: As you sort, look for any bulbs that feel soft or have "thick necks" (don't feel tight and dry). Use those immediately in your cooking, as they will be the first to spoil in storage