Salsify is one of those "secret weapon" vegetables—a vintage root that looks like a stray branch but tastes like a gourmet dream. Often called the "Oyster Plant," it has a devoted following among chefs and heirloom gardeners for its unique flavor profile and velvety texture.
What Exactly Is It?
Salsify belongs to the dandelion family and comes in two primary varieties:
Black Salsify (Scorzonera hispanica): The more popular variety. It has a dark, cork-like skin and a fleshy white interior. It’s generally considered smoother and more flavorful.
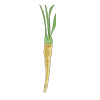
White Salsify (Tragopogon porrifolius): Also known as "Goat’s Beard," this version is tan or off-white and looks a bit like a thin, hairy parsnip.
The Flavor Profile
The reason people hunt for salsify is its taste. It is remarkably subtle and sophisticated:
The "Oyster" Connection: When cooked, it has a distinct oceanic sweetness that mimics oysters or artichoke hearts.
The Texture: Once boiled or steamed, the flesh becomes incredibly creamy, similar to a well-cooked potato but with more structural integrity.
How to Use It in the Kitchen
Salsify is versatile but requires a little "prep-work patience." Because it oxidizes (turns brown) quickly once peeled, it’s usually dropped straight into "acidulated water" (water with lemon juice or vinegar)
How To Grow
Growing salsify is very similar to growing carrots or parsnips, but it's actually a bit more "forgiving." It’s a cool-season biennial typically grown as an annual for its long, tapered taproot.
Here is the blueprint for a successful salsify patch:
- Timing and Soil Prep
When to Plant: Sow seeds directly outdoors in early spring (March to May), as soon as the soil can be worked. It needs a long growing season—roughly 120 to 150 days.
+1
The Soil: This is the most important part. You need deep, stone-free, loose soil. If the root hits a rock or hard clay, it will "fork" (split into multiple hairy roots), making it a nightmare to peel later.
Avoid Fresh Manure: Like many root crops, fresh manure causes the roots to branch. Use well-rotted compost instead.
- Sowing the Seeds
Depth: Plant seeds about 1.5cm (1/2 inch) deep.
Spacing: Space rows about 30cm (12 inches) apart.
Thinning: Once seedlings are a few inches tall, thin them to be 10-15cm (4-6 inches) apart.
Patience: Salsify is a slow starter. It can take up to 21 days just to germinate, so don’t give up on them too early!
- Ongoing Care
Watering: Keep the soil consistently moist. If the soil dries out completely, the roots can become woody or the plant might "bolt" (go to seed) prematurely.
Weeding: Because it grows slowly, it can easily be smothered by weeds. Weed carefully by hand to avoid damaging the delicate crown of the root.
Pests: It is remarkably pest-resistant compared to carrots, though you should still watch for aphids on the leaves.
- Harvesting
The Frost Factor: You can start digging them up in October or November, but they actually taste better after a couple of hard frosts, which converts their starches into sugars.
The Technique: The roots are brittle. Don’t just pull from the tops or they will snap! Use a garden fork to loosen the soil deeply around the root before lifting.
Overwintering: In most climates, you can leave them in the ground all winter and harvest as needed. Just mulch them with straw so the ground doesn't freeze them in place
How/When To Harvesting
Harvesting salsify requires a bit more finesse than pulling up a carrot. Because the roots are long (often reaching 20–30cm) and surprisingly brittle, they can snap easily if you try to "muscle" them out of the ground.
Here is the step-by-step guide to a clean harvest:
- Timing the Harvest
Wait for the Frost: While you can harvest in late autumn, the flavor significantly improves after the first few frosts. Cold temperatures trigger the plant to convert its starches into sugars.
The Window: Most varieties are ready 120 to 150 days after sowing. In the UK and similar climates, this usually means October through February.
Storage in Ground: Salsify is incredibly hardy. You don’t have to harvest the whole crop at once; you can leave them in the soil and dig them up as needed throughout the winter.
- The Extraction Process
Crucial Rule: Never pull by the leaves. The tops will almost certainly snap off, leaving the root buried and much harder to find.
Step 1: Clear the area. Trim back the long, grass-like foliage to about 5cm (2 inches) so you can see exactly where the crown of the root is.
Step 2: Use a garden fork. Insert a long-tined garden fork or a spade vertically into the soil about 15cm (6 inches) away from the plant.
Step 3: Loosen the soil. Gently rock the fork back and forth to loosen the earth. Do this on a couple of sides of the root to break the suction of the soil.
Step 4: Lift gently. Once the soil is loose, reach down and grasp the root as low as possible, lifting it steadily while continuing to pry with the fork.
- Post-Harvest Handling
Shake, Don't Scrub: Shake off the loose soil. Avoid washing them until you are ready to use them, as the dampness can encourage rot during storage.
Trimming: Trim the greens down to about 2cm (1 inch) above the crown.
Bleeding: If you snap a root, you’ll notice a milky sap (latex) leaking out. This is normal! Just wipe it away; it will eventually seal itself.
- Storage Tips
Short Term: Keep them in the crisper drawer of your fridge in a perforated plastic bag. They will stay fresh for about 2–3 weeks.
Long Term: If you have a root cellar or a cool garage, store them in a box of damp sand or sawdust. This mimics being in the ground and can keep them firm for several months.
A "Bonus" Harvest: The Shoots
If you leave a few roots in the ground over winter, they will send up new growth in the spring. These young shoots (sometimes called "chards") are edible and delicious—tender, sweet, and great in salads or lightly steamed