The white onion is the sharp, sophisticated sibling of the onion family. While yellow onions are the "workhorses" and red onions are the "beauties," white onions are prized for their clean, crisp profile and high water content.
Here is a breakdown of what makes them unique:
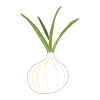
Appearance and Texture
Skin: Unlike the papery, golden-brown skin of yellow onions, white onions have a thin, snowy-white, almost translucent skin.
Flesh: The interior is pure white and exceptionally crunchy. Because they have a higher water content, they feel firm and "snappy" when bitten into.
Flavor Profile
White onions have a sharper, more pungent bite than yellow onions, but they lack the lingering aftertaste. They are often described as having a "cleaner" flavor.
Raw: They provide a bright, zesty kick.
Cooked: They soften and sweeten, though they don't caramelize quite as deeply or richly as yellow onions due to a slightly lower sugar-to-sulphur ratio
How To Grow
Growing white onions is a rewarding game of patience. Because they have a slightly thinner skin than yellow onions, they are a bit more sensitive to moisture, but they are generally straightforward to manage if you get the timing right.
Here is your guide to going from a tiny bulb to a crisp harvest.
- Choose Your Starting Point
You have three options to get started, ranging from "easy" to "expert":
Sets (Small Bulbs): The easiest method. These are immature bulbs from the previous year. They establish quickly and are resistant to frost.
Transplants: Seedlings started by a nursery. These offer a head start on the growing season.
Seeds: The most cost-effective but slowest method. You’ll need to start these indoors 8–10 weeks before the last frost.
- Preparation and Planting
Onions are "heavy feeders," meaning they love nutrient-rich soil.
Sunlight: Choose a spot with full sun (at least 6–8 hours a day).
Soil: Use well-draining soil enriched with compost. Onions hate "wet feet," so avoid heavy clay that traps water.
Spacing: Plant sets or seedlings 4 inches apart in rows spaced 12 inches apart.
Depth: Bury sets about 1 inch deep with the pointy end facing up. Don't bury them too deep, or the bulb won't be able to expand.
- Care and Maintenance
The secret to big, crunchy white onions is consistency.
Watering: Onions need about 1 inch of water per week. If the soil is bone-dry, the bulbs will get "hot" (excessively spicy) or stop growing.
Mulching: Use a light layer of straw to keep moisture in and—more importantly—to keep weeds out. Onions have shallow roots and don't like competing for nutrients.
Fertilizing: Every 2–3 weeks, give them a nitrogen-rich fertilizer to encourage leaf growth. More leaves = bigger bulbs.
- Harvesting and Curing
You’ll know they are ready when the plant tells you.
The Signal: When the green tops turn yellow and flop over, the onion has stopped growing.
The Pull: Gently loosen the soil and pull the bulbs.
The Cure: If the weather is dry, let them sit on the soil surface for 2 days. Then, move them to a shaded, breezy area (like a porch or garage) for 2–3 weeks until the skins are papery and the roots are brittle.
A Note on "Day Length"
Onions are sensitive to how much daylight they get. Before you buy seeds, check your "zone":
Short-Day: Best for the Southern US/warmer climates.
Long-Day: Best for Northern regions with long summer days.
Intermediate: Good for the "middle" latitudes
How/When To Harvesting
Harvesting white onions is all about timing and technique. Because white onions have a higher water content and thinner skins than yellow varieties, they are slightly more prone to bruising and rot if not handled correctly.
Here is the step-by-step process for a successful harvest.
- Watch for the "Flopping" Signal
The onion will tell you exactly when it has finished growing.
The Soft Neck: First, the area just above the bulb (the neck) will feel soft and weak.
The Flop: Eventually, the green tops will lose their rigidity and fall over.
The 75% Rule: For the best storage, wait until about 75% to 90% of your onion tops have fallen over naturally. If you harvest too early, the bulb isn't fully dormant; too late, and you risk rot from soil moisture.
- The Gentle Extraction
Avoid the temptation to just grab the green tops and pull.
Loosen the Soil: Use a garden fork or a hand trowel to gently pry the soil upward about 3–4 inches away from the bulb.
Lift, Don't Pull: Once the soil is loose, lift the onion out. If you pull too hard by the leaves, you can damage the "neck" where it meets the bulb, which allows bacteria to enter.
Shake, Don't Scrub: Gently shake off any large clumps of dirt. Do not wash them with water—moisture is the enemy of a successful harvest.
- Curing for Storage
Unless you plan to eat them fresh that night, white onions need to "cure" to develop that protective papery skin.
Dry Weather: If the forecast is clear and dry for several days, you can leave the onions laying on the soil surface to dry in the sun.
Indoor Curing: If it’s humid or rainy, move them to a shaded, well-ventilated area (like a porch or garage). Spread them out in a single layer on a screen or a crate so air can circulate around the entire bulb.
+1
Timeline: Let them cure for 2–3 weeks. You’ll know they are done when the roots are brittle and the neck is completely shrivelled and dry to the touch.
- Final Trimming
Once cured, use clean garden shears to:
Trim the Roots: Cut them to about 1/4 inch.
Trim the Tops: Cut the dried foliage off about 1 inch above the bulb. (Don't cut too close to the bulb, or you'll break the seal that keeps the onion fresh)