The brown onion (also known as the yellow onion) is the undisputed workhorse of the culinary world. While it might not be the prettiest vegetable in the bin, it is the secret engine behind the flavour of almost every savoury dish you love.
Appearance and Texture
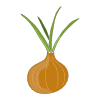
The Exterior: They are wrapped in multiple layers of papery, golden-brown skin that crackles to the touch.
The Interior: Beneath the parchment-like skin, the flesh is off-white or pale yellow, crisp, and tightly layered.
Shelf Life: Because of their thick skins and low moisture content compared to white onions, they are incredibly hardy and can stay fresh in a cool, dark pantry for weeks.
Flavour Profile
The brown onion is famous for its transformation.
Raw: It is pungent, sharp, and spicy. It contains a high sulphur content, which provides that distinctive "bite" (and is usually the culprit behind your tears when chopping).
Cooked: This is where the magic happens. Brown onions have a higher sugar content than most other varieties. When heated, those sugars break down—a process called caramelization—turning the onion soft, translucent, and deeply sweet.
Best Culinary Uses
Because they hold their structure well under heat and balance sweetness with acidity, they are the go-to choice for:
Foundational Cooking: The base for soups, stews, and stocks.
Slow Roasting: Perfect for French Onion soup or caramelized onion jam.
Sautéing: The essential first step for curries, casseroles, and pasta sauces.
Pro Tip: If a recipe simply says "onion" without specifying a colour, reach for the brown onion. Its balanced flavour makes it the most versatile player in the kitchen
How To Grow
Growing brown onions is a lesson in patience, but the payoff—onions with way more "zing" than the supermarket variety—is worth the wait. They are a cool-season crop, meaning they like to get established while the ground is chilly.
- Choose Your Method
You have two main ways to start:
Sets (Small Bulbs): These are the "easy mode" of onion growing. They are immature bulbs that establish quickly and are less prone to pests.
Seeds: Cheaper and offer more variety, but they take longer to mature and require more attention in the early stages.
- Timing and Soil Prep
Onions are sensitive to day length. Most brown onions are "Long Day" or "Intermediate Day" varieties, meaning they start forming bulbs when the days get longer in spring.
When to plant: Early spring (as soon as the soil can be worked) or late autumn for certain hardy varieties.
Soil: They love well-draining, fertile soil. Dig in some aged compost or well-rotted manure a few weeks before planting.
Sunlight: Full sun is non-negotiable. They need at least 6–8 hours a day to bulk up.
- Planting
From Sets: Push them into the soil so just the very tip is poking out. Space them about 10cm (4 inches) apart, with rows 30cm (12 inches) apart.
From Seeds: Sow about 1cm deep. You’ll need to thin them out later so they aren't cramped.
- Maintenance
Onions are poor competitors; they don't like roommates.
Weeding: Keep the area meticulously weed-free. Use your hands rather than a hoe to avoid nicking the shallow bulbs.
Watering: Keep the soil moist but not soggy. If the soil cracks, the bulbs might split.
Feeding: A nitrogen-rich fertilizer every few weeks helps leaf growth, but stop feeding once you see the bulbs starting to swell.
- The Harvest
You’ll know they are ready when the leaves turn yellow and collapse.
Ease them out: Use a garden fork to gently lift them from the soil.
Curing: This is the most important step for brown onions. Lay them out in a dry, sunny spot (or a ventilated shed) for 2–3 weeks until the outer skins are papery and the necks are completely dry.
Storage: Store in a cool, dark, dry place in mesh bags or hung in braids
How/When To Harvesting
Harvesting brown onions is all about timing and "curing." If you pull them too early, they won’t store well; if you leave them too long, they can rot or start growing again.
Here is the step-by-step guide to a perfect harvest.
- Watch for the "The Flop"
Unlike many vegetables that you harvest when they look "at their peak," onions tell you they are ready by dying back.
The Signal: The green tops will turn yellow, lose their stiffness, and eventually topple over at the neck.
The Wait: Once about 50% to 75% of your crop has flopped over, stop watering them entirely. Let them sit in the dry soil for another 3 to 7 days to begin the ripening process.
- Lifting the Bulbs
Onions are delicate despite their tough reputation. Don't just grab the leaves and yank, as this can damage the "neck" and lead to rot.
Loosen the Soil: Use a garden fork or trowel to gently pry the soil upward about 2 or 3 inches away from the bulb.
The Lift: Once the soil is loose, lift the onion out by the base.
Clean: Gently shake off excess dirt. Do not bang them against each other or a hard surface; onions bruise easily, and a bruised onion won't last the winter.
- The Curing Process (Critical Step)
Brown onions need to be "cured" to develop that papery skin that protects them from rotting.
Sun Drying: If the weather is dry and clear, leave the onions laying on the surface of the soil for 1–2 days to dry in the sun.
Shade Drying: If rain is forecast or the sun is extremely intense (which can "sunscald" the bulbs), move them to a well-ventilated, shaded area like a porch, garage, or shed.
The Setup: Spread them out in a single layer. Do not stack them. They need airflow on all sides.
- Trimming and Storing
After 2 to 3 weeks of curing, the roots should be brittle and the necks should be completely dry and shrivelled.
Trimming: Use garden snips to trim the roots to about 1cm. You can cut the tops off (leaving about 2cm of neck) or leave them on if you plan to braid them.
Selection: Inspect every onion. If any feel soft, have thick "green" necks, or show signs of mould, use those immediately in the kitchen. Only the perfectly dry, hard ones should go into long-term storage.
Environment: Store in mesh bags, crates, or old pantyhose in a cool, dark, and dry place.
A Quick Warning: Never store onions near potatoes. Potatoes release moisture and ethylene gas that will cause your onions to sprout and spoil much faster