Whether you know it as a spicy condiment or those vibrant yellow blankets covering farm fields in the spring, the mustard plant is one of the most versatile and resilient plants on the planet.
Belonging to the Brassicaceae family (alongside cousins like broccoli, kale, and cabbage), mustard is much more than just a burger topping.
Physical Characteristics
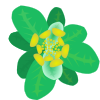
The mustard plant is easily recognizable by its bright, cheery appearance and rapid growth.
Flowers: Most varieties produce small, four-petaled yellow flowers that grow in clusters. These flowers are highly attractive to bees and pollinators.
Leaves: The foliage is often lobed and deep green. Depending on the variety, the leaves can be smooth or slightly "hairy" and possess a peppery, pungent flavour.
Seeds: Once the flowers fade, they develop into small pods called siliques. Inside are the tiny, round seeds (yellow, brown, or black) used for oil and spices.
Why It’s a "Super" Plant
Mustard isn't just a culinary staple; it’s a hard worker in the ecosystem and the kitchen.
Culinary Versatility: Every part of the plant is edible. The seeds are ground into paste, the leaves are eaten as spicy greens, and the oil is used for high-heat cooking.
Agricultural Hero: Farmers often use mustard as a cover crop. It grows so fast that it naturally chokes out weeds, and its deep roots help prevent soil erosion.
Natural Defence: Mustard plants contain compounds called glucosinolates. When the plant is crushed or chewed, these turn into the spicy "kick" we love, which actually serves as a natural defence mechanism against pests.
+1
Fun Fact
Mustard is one of the oldest recorded spices in the world, dating back to ancient Sanskrit writings. Even the Romans were fans—they used to mix unfermented grape juice (must) with ground seeds to create mustum ardens ("burning must"), which is where we get the name mustard.
How To Grow
Growing mustard is incredibly rewarding because it’s a "high-reward, low-effort" plant. It grows fast, thrives in cool weather, and is rarely bothered by the pests that plague other garden vegetables.
Here is your guide to going from seed to harvest.
- Timing and Location
Mustard is a cool-season crop. It prefers the mild temperatures of spring or autumn.
Temperature: It grows best between 7°C and 24°C. If it gets too hot, the plant will "bolt" (go to seed) and the leaves will become unpleasantly bitter.
Sunlight: Full sun is ideal (6+ hours), but mustard is one of the few vegetables that will tolerate partial shade, which can actually help keep it cool in warmer snaps.
Soil: It prefers well-draining soil rich in organic matter, with a pH between 6.0 and 7.5.
- Sowing the Seeds
You don't need to start these indoors; mustard has a delicate root system and prefers being sown directly into the garden.
Preparation: Rake the soil smooth and remove any large stones.
Planting: Sow seeds about 1 cm deep.
Spacing: Space seeds about 2–5 cm apart in rows. If you are growing them specifically for large leaves, leave about 30 cm between rows.
Watering: Mist the soil immediately after planting. Keep the soil consistently moist until germination, which usually happens in just 3 to 7 days.
- Care and Maintenance
Once the seedlings are a few inches tall, follow these steps to keep them happy:
Thinning: If you planted densely, pull out every other seedling so the remaining plants are about 10–15 cm apart. You can eat the "thinnings" in a salad!
Watering: Mustard needs consistent moisture. If the soil dries out completely, the plant thinks it’s dying and will bolt prematurely.
Mulching: Add a layer of straw or dried leaves around the base to keep the roots cool and retain moisture.
- Harvesting
You can start harvesting mustard much sooner than most other crops.
Baby Greens: Harvest at 20 days. These are tender and perfect for raw salads.
Full Grown: Harvest at 40–50 days. Cut the outer leaves and leave the centre to keep growing ("cut and come again" method).
Collecting Seeds: If you want mustard seeds for spice, wait for the plant to flower and the green pods to turn tan/brown. Pick them before they burst open, and let them dry upside down in a paper bag.
Quick Troubleshooting
Watch out for Flea Beetles: These are tiny black bugs that jump and leave "shotholes" (tiny circles) in the leaves. To prevent this, use a row cover (a thin fabric) over your plants as soon as they sprout
How/When To Harvesting
Harvesting mustard is a "choose your own adventure" process. Depending on whether you want tender salad greens, hearty sautéing leaves, or spicy seeds for homemade condiments, the timing and technique change.
Here is how to handle each stage of the harvest.
- Harvesting "Baby" Greens (2–3 Weeks)
If you want a mild, peppery kick for salads or sandwiches, harvest the leaves when they are about 5–10 cm (2–4 inches) long.
The Technique: Use garden shears to snip the entire plant off about 1 cm above the soil line.
The Result: These are the most tender and least bitter leaves. They don't stand up well to heat, so eat them raw.
- Harvesting Mature Leaves (4–6 Weeks)
For southern-style "braised greens" or stir-frys, you want larger, sturdier leaves.
The "Cut and Come Again" Method: This is the best way to extend your harvest. Snip only the outermost leaves from the plant, leaving the small, young leaves in the centre (the growing point) intact.
Pro Tip: Don't let the leaves get much larger than the palm of your hand. If they get too huge, they become "woody" and incredibly spicy—sometimes unpleasantly so.
Frequency: You can usually return to the same plant every 5–7 days for a new harvest until the weather turns hot.
- Harvesting Mustard Seeds (3+ Months)
If your plant has started producing yellow flowers, you’ve missed the window for tasty leaves, but you’re right on track for a seed harvest.
Wait for the Pods: After the flowers fall off, small green pods (siliques) will form. Wait for these to turn tan or light brown.
The "Paper Bag" Trick: If you wait until the pods are completely dry on the plant, they will shatter and scatter seeds everywhere. Instead, cut the entire stalk when the pods are brown but still closed.
Drying: Place the stalks upside down in a large paper bag. Hang the bag in a cool, dry place for 1–2 weeks.
Threshing: Shake the bag vigorously or crush the pods by hand inside the bag. The seeds will fall to the bottom. Sift out the dried pod "chaff" (the husks) and store your seeds in a glass jar.