Kohlrabi greens are the unsung heroes of the vegetable world. While most people toss them aside to get to the bulbous "German Turnip" root, these leaves are actually a nutritional powerhouse with a flavour profile that sits comfortably between kale and collard greens.
Appearance & Texture
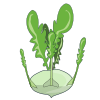
Kohlrabi leaves grow on long, slender stalks branching out from the main bulb.
The Leaves: Large, fan-like, and dark green with a slightly waxy coating (similar to kale).
The Stems: Often tinged with the same colour as the bulb—either a vibrant light green or a striking purple.
Texture: They are sturdier than spinach but more tender than fully grown collards, offering a satisfying "crunch" when raw and a velvety finish when sautéed.
Flavour Profile
If you enjoy the peppery bite of a radish mixed with the earthy sweetness of broccoli, you’ll love kohlrabi greens.
Raw: They have a mild, nutty, and slightly spicy mustard-like quality.
Cooked: The heat mellows the bitterness, bringing out a savoury, mild sweetness that pairs perfectly with garlic, lemon, or bacon.
🍳 Culinary Uses
Don't let them go to waste! You can use them anywhere you’d use other hardy greens:
Sautéed: Quick-fry them in olive oil with garlic and red pepper flakes.
Soups & Stews: Toss them into a minestrone or bean soup during the last 10 minutes of cooking.
Salads: Thinly slice (chiffonade) the younger, tender leaves to add a peppery kick to a slaw.
Smoothies: A great, less-bitter alternative to kale for your morning green drink.
Pro Tip: If your kohlrabi greens feel a bit tough, remove the thick central rib before cooking. You can chop those stems up and sauté them first (since they take longer to soften) before adding the leaves.
How To Grow
Growing kohlrabi is a rewarding "quick-win" for gardeners. Because it thrives in the shoulder seasons (Spring and Autumn), it’s often one of the first things you’ll harvest in the year.
When to Plant
Kohlrabi is a cool-weather crop. It doesn't handle extreme heat well, which can make the bulb woody and unpleasantly "spicy."
Spring Crop: Plant outdoors 3–4 weeks before the last frost.
Autumn Crop: Plant 6–8 weeks before the first expected hard frost.
Ideal Temp: It grows best when air temperatures are between 15°C and 22°C.
Planting Steps
-
Choose Your Spot
Kohlrabi needs full sun (at least 6 hours a day) and well-draining soil rich in organic matter. If your soil is heavy clay, add some compost to loosen it up.
-
Sowing Seeds
You can start seeds indoors, but they transplant easily or can be sown directly:
Depth: Plant seeds about 1 cm deep.
Spacing: Space plants 10–15 cm apart. If planting in rows, keep rows about 30 cm apart.
Thinning: If you sow directly, thin the seedlings once they are 5 cm tall to ensure the bulbs have room to expand.
- Care and Feeding
Watering: This is the "secret sauce." Kohlrabi needs consistent moisture. If the soil dries out and then gets drenched, the bulbs can crack. Aim for 2.5 cm of water per week.
Mulching: Add a layer of straw or dried leaves around the base to keep the roots cool and retain moisture.
Fertilizing: If your soil is already nutrient-rich, you're set. Otherwise, a balanced organic fertilizer applied once mid-season is plenty.
How/When To Harvesting
Harvesting kohlrabi is all about timing. If you wait too long, the bulb transforms from a crunchy, apple-like delicacy into a piece of wood that even a sharp knife can’t penetrate.
Here is how to ensure you get the perfect harvest.
When to Harvest
Most varieties are ready to pick 45 to 60 days after planting.
Size Matters: The "sweet spot" for most varieties (like White Vienna or Purple Vienna) is when the bulb is between 5 cm and 8 cm in diameter—roughly the size of a tennis ball.
The Exception: "Giant" varieties (like Kossak) are bred to stay tender even when they grow as large as a bowling ball, but unless you’re sure you planted a giant variety, stick to the tennis ball rule.
The Leaf Test: If the lower leaves start to turn yellow or look "tired," it’s definitely time to pull the plant.
The Harvest Process
You don't need heavy machinery, just a sharp pair of garden shears or a sturdy kitchen knife.
Loosen the Soil (Optional): If your soil is very loose, you can simply pull the entire plant up by the base of the stems. If the soil is firm, it's better to cut it.
The Cut: Reach down to the base of the bulb where it meets the soil. Slice the thin taproot just below the bulb.
Trim the Stems: Once the plant is out, cut off the long leafy stalks. Leave about 2 cm of stem attached to the bulb if you aren't eating it immediately; this helps it stay fresh longer.
Save the Greens: Don't toss those leaves! Separate the healthy green leaves from the bulb immediately to stop them from drawing moisture out of the root.
Post-Harvest Storage
Kohlrabi stores remarkably well if you prep it correctly:
The Bulbs: Store them in the crisper drawer of your fridge. They will stay crunchy for 3–4 weeks. Do not peel them until you are ready to cook.
The Greens: Treat these like kale or spinach. Wrap them in a damp paper towel, put them in a reusable bag, and use them within 3–5 days.
Long Term: You can blanch and freeze kohlrabi slices, though they lose their signature "crunch" and are best used in soups or mashes after freezing.
Quick Tip: If you find you’ve harvested a "woody" bulb (one that feels very tough), don't throw it out! Peel it deeply—past the fibrous outer layer—and grate the centre into a slaw, or boil it and puree it with potatoes.