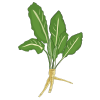
Part culinary staple and part chemical weapon, this root vegetable is a member of the Brassicaceae family—making it a cousin to mustard, wasabi, and broccoli. Here is the lowdown on the world’s most pungent root.
The Flavour Profile: "Cold Heat"
Unlike chili peppers, which contain capsaicin and burn the tongue, horseradish contains allyl isothiocyanate.
The Sensation: It produces a volatile vapor that travels up the back of the throat to the nose.
The Experience: It’s a sharp, piercing heat that hits instantly and vanishes almost as quickly, leaving behind a clean, slightly sweet, and earthy aftertaste.
From Garden to Jar
In its natural state, a horseradish root looks like a drab, woody parsnip and has almost no smell. The "magic" happens when the root is grated or crushed.
Cellular Reaction: Breaking the cells mixes enzymes that produce the pungent mustard oil.
The Vinegar Fix: To stop the heat from becoming bitter and overwhelming, producers add vinegar.
Timing is Everything: Adding vinegar immediately results in a mild sauce; waiting a few minutes creates a "double-hot" version.
Common Culinary Uses
Horseradish is the ultimate "brightener" for heavy, rich foods. You’ll typically find it in:
The Classics: A side for Prime Rib or folded into cocktail sauce for shrimp.
The "Faux-sabi": Most "wasabi" served in the West is actually dyed horseradish.
Drink Mixes: A mandatory kick for a proper Bloody Mary.
Creamy Sauces: Blended with sour cream or mayo to top sandwiches and roasted beets.
Fun Fact: Horseradish has been used for over 3,000 years. The ancient Greeks used it as a back-rub for pain relief, and it’s one of the "bitter herbs" used during Jewish Passover Seders to symbolize the bitterness of slavery.
How To Grow
Growing horseradish is a bit like inviting a friendly but overenthusiastic guest into your home: it’s incredibly easy to host, but it can be very difficult to get it to leave. Because it is a hardy perennial, even a tiny scrap of root left in the soil can grow into a new plant.
Here is how to cultivate your own "sinus-clearing" harvest.
- Timing and Location
When to Plant: Plant in early spring as soon as the soil can be worked.
The "Forever" Spot: Choose a permanent location. Since horseradish is difficult to eradicate once established, many gardeners use a dedicated raised bed or a large, deep pot to keep it from spreading.
Sun & Soil: It thrives in full sun (though it tolerates partial shade) and prefers loose, well-draining soil rich in organic matter.
- Planting the Root
You don’t usually plant seeds; you plant root cuttings (often called "sets").
The Angle: Dig a hole about 12 inches deep. Plant the root at a 45-degree angle.
Orientation: If your cutting has a slanted cut on one end and a straight cut on the other, the straight end goes up.
Depth: Cover the root so the top is about 2–3 inches below the soil surface. Space multiple plants about 18–24 inches apart.
- Care and Maintenance
Horseradish is famously low-maintenance, but a little attention yields better roots:
Watering: Keep the soil consistently moist. If the soil gets too dry, the roots can become woody and lose their flavour.
Fertilizing: A shot of compost tea or a low-nitrogen fertilizer in early summer is plenty. Avoid high-nitrogen fertilizers, which encourage lush leaves but spindly, weak roots.
The "Secret" Pro-Tip: For the thickest, smoothest roots, some gardeners "strip" the plants in mid-summer. They pull back the soil and strip away the small side roots from the main taproot, then recover it.
How/When To Harvesting
Harvesting horseradish is a bit like a treasure hunt—you know the prize is down there, but it takes a little muscle to get it out without snapping the roots.
The best time to harvest is in late autumn (after a few hard frosts) or early spring before the new growth starts. Cold weather actually triggers the plant to store more starch and pungent oils in the root, leading to a much better "kick."
The Step-by-Step Harvest
-
Clear the Foliage
Once the leaves have turned yellow or been hit by frost, trim them back to about 2–3 inches above the soil. This gives you a "handle" and shows you exactly where the center of the crown is located.
-
Loosen the Soil (The Critical Step)
Do not just grab the leaves and pull; you’ll likely snap the top off and leave the best part of the root in the ground.
Use a garden fork or a long spade.
Dig a circle about 12 inches away from the centre of the plant.
Gently rock the fork back and forth to loosen the soil all the way around the root.
- Lift the Root
Once the soil is loose, reach down and lift the main taproot.
A healthy root can be 10–12 inches long and quite thick.
Shake off the excess dirt, but don't scrub it with water yet if you plan on storing it for a while (moisture leads to rot).
- Prepare for Next Year
Horseradish is the gift that keeps on giving—often whether you want it to or not.
To keep the patch going: Cut off the small "lateral" roots (the pencil-thin ones branching off the main root) and immediately replant them about 12 inches apart.
To prevent a takeover: Try to remove as many tiny root fragments as possible, as any piece left behind will become a new plant by summer.
Storage and Handling
The "Dirty" Method: For the longest shelf life, store unwashed roots in a dark, cool, and humid place (like a root cellar) buried in damp sand. They can last up to 6 months this way.
The Fridge Method: Wrap the unwashed root in a damp paper towel, place it in a perforated plastic bag, and keep it in the vegetable crisper. It should stay pungent for 1–2 months.
Pro-Tip: Never peel or grate the root until you are actually ready to eat it. Once the root is cut, the chemical reaction that creates the heat begins, and the flavour starts to degrade immediately.